Encrypting Azure VMs using Azure Disk Encryption and Azure Key Vault
A while ago, when I was studying for the AZ-500 exam I spent a fair chunk of time understanding Azure Disk Encryption (ADE) and Server Side Encryption (SSE) so I figured I’d come back and write up explaining it and demonstrating it for those who might be in the same boat I was in!
First, let’s get into the details about key management
Platform Managed Keys and Customer Managed Keys
There’s two types of encryption keys; platform-managed keys (PMK) and customer-managed keys (CMK).
With PMK’s, Azure manages the encryption keys. All data (disks, snapshots, images) is automatically encrypted at rest with PMKs.
With CMKs, the customer (you) manages the encryption keys. You store these keys in an Azure Key Vault. You can import your own RSA keys into Key Vault or create new RSA keys in Key Vault.
Key differences between Azure Disk Encryption and Server Side Encryption
To put it simply, Server Side Encryption encrypts your disks at the storage account level, at rest. When you write data to the disk it is transmitted back to the underlying storage account unencrypted and is then encrypted at the storage account level.
Azure Disk Encryption encrypts your disks at the Azure hypervisor level using in-guest OS encryption such as BitLocker for Windows VMs and DM-Crypt for Linux VMs. The data is transmitted back to the underlying storage account encrypted. Essentially, ADE encrypts your data end-to-end whereas SSE only encrypts it at end.
Server Side Encryption is always enabled. You cannot turn it off as it’s a platform-level feature.
What one should I use?
I’m afraid the answer, as with a lot of Microsoft things is: “It depends.”
It depends on your organisations security and compliance requirements. If your organisation must ensure that all organisation data is encrypted at rest then SSE is suitable. If however, you must ensure that data is encrypted end-to-end, that it’s encrypted using your own encryption keys or that you can regularly rotate (change) the encryption keys then ADE will be what you need.
How do I setup SSE?
By doing absolutely nothing. Just create a VM and it’ll be done automatically by the Azure platform.
Here’s a screenshot of the disks of a VM encrypted with SSE only

Note the ‘Encryption’ column shows ‘SSE with PMK’. That’s the default option when you create a VM. When creating a VM, you have the following options.
Keep in mind however that these options relate only to Managed Disks with CMK, not ADE.

How do I setup ADE?
In this scenario, I’ll explain how to enable ADE via the Azure Portal.
Enabling ADE via the Azure Portal
ADE can only be enabled via the portal after a VM has been created. You cannot currently do so when creating a VM in the portal.
Once the VM is created, follow the below steps:
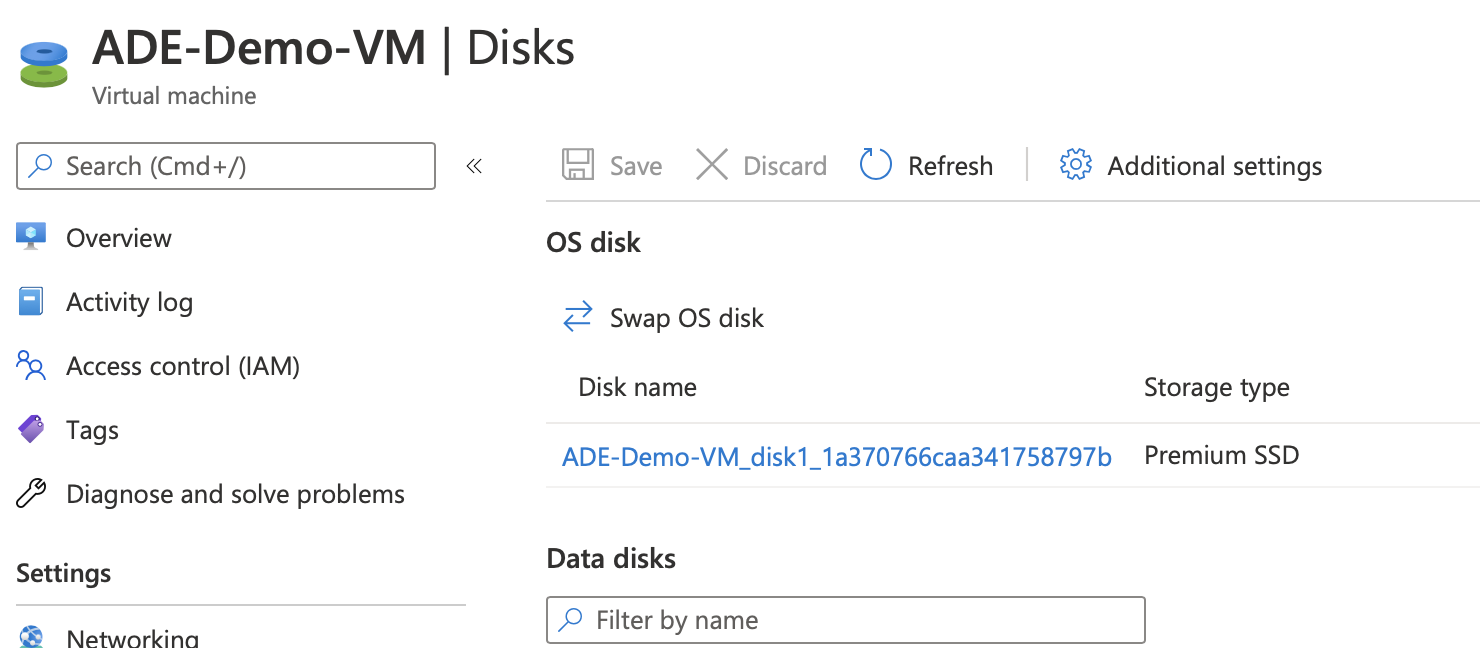
Navigate to Disks and select “Additional settings”
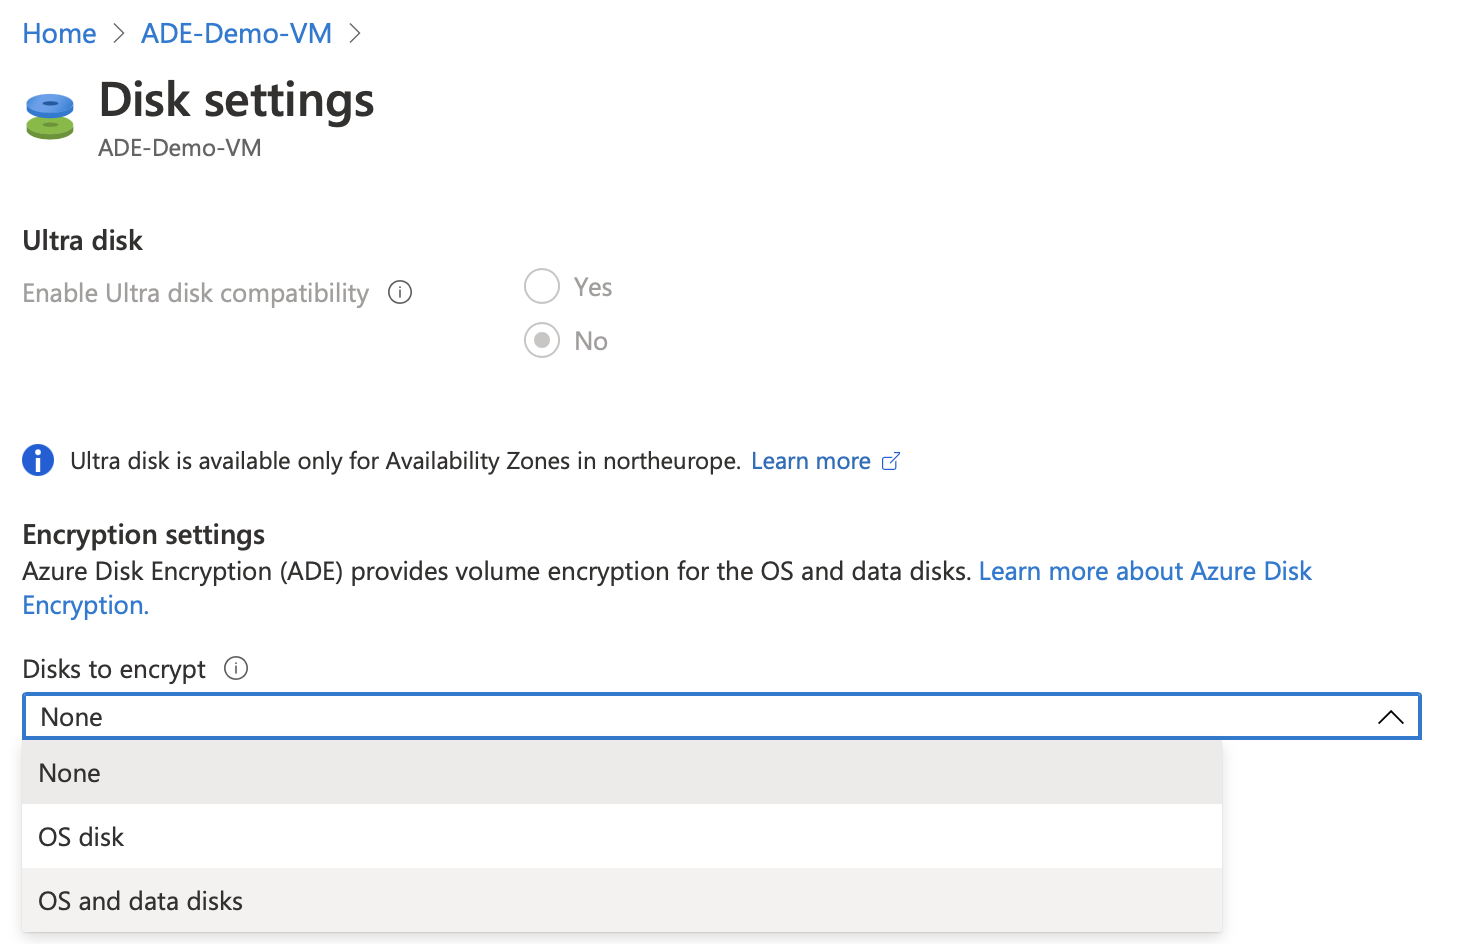
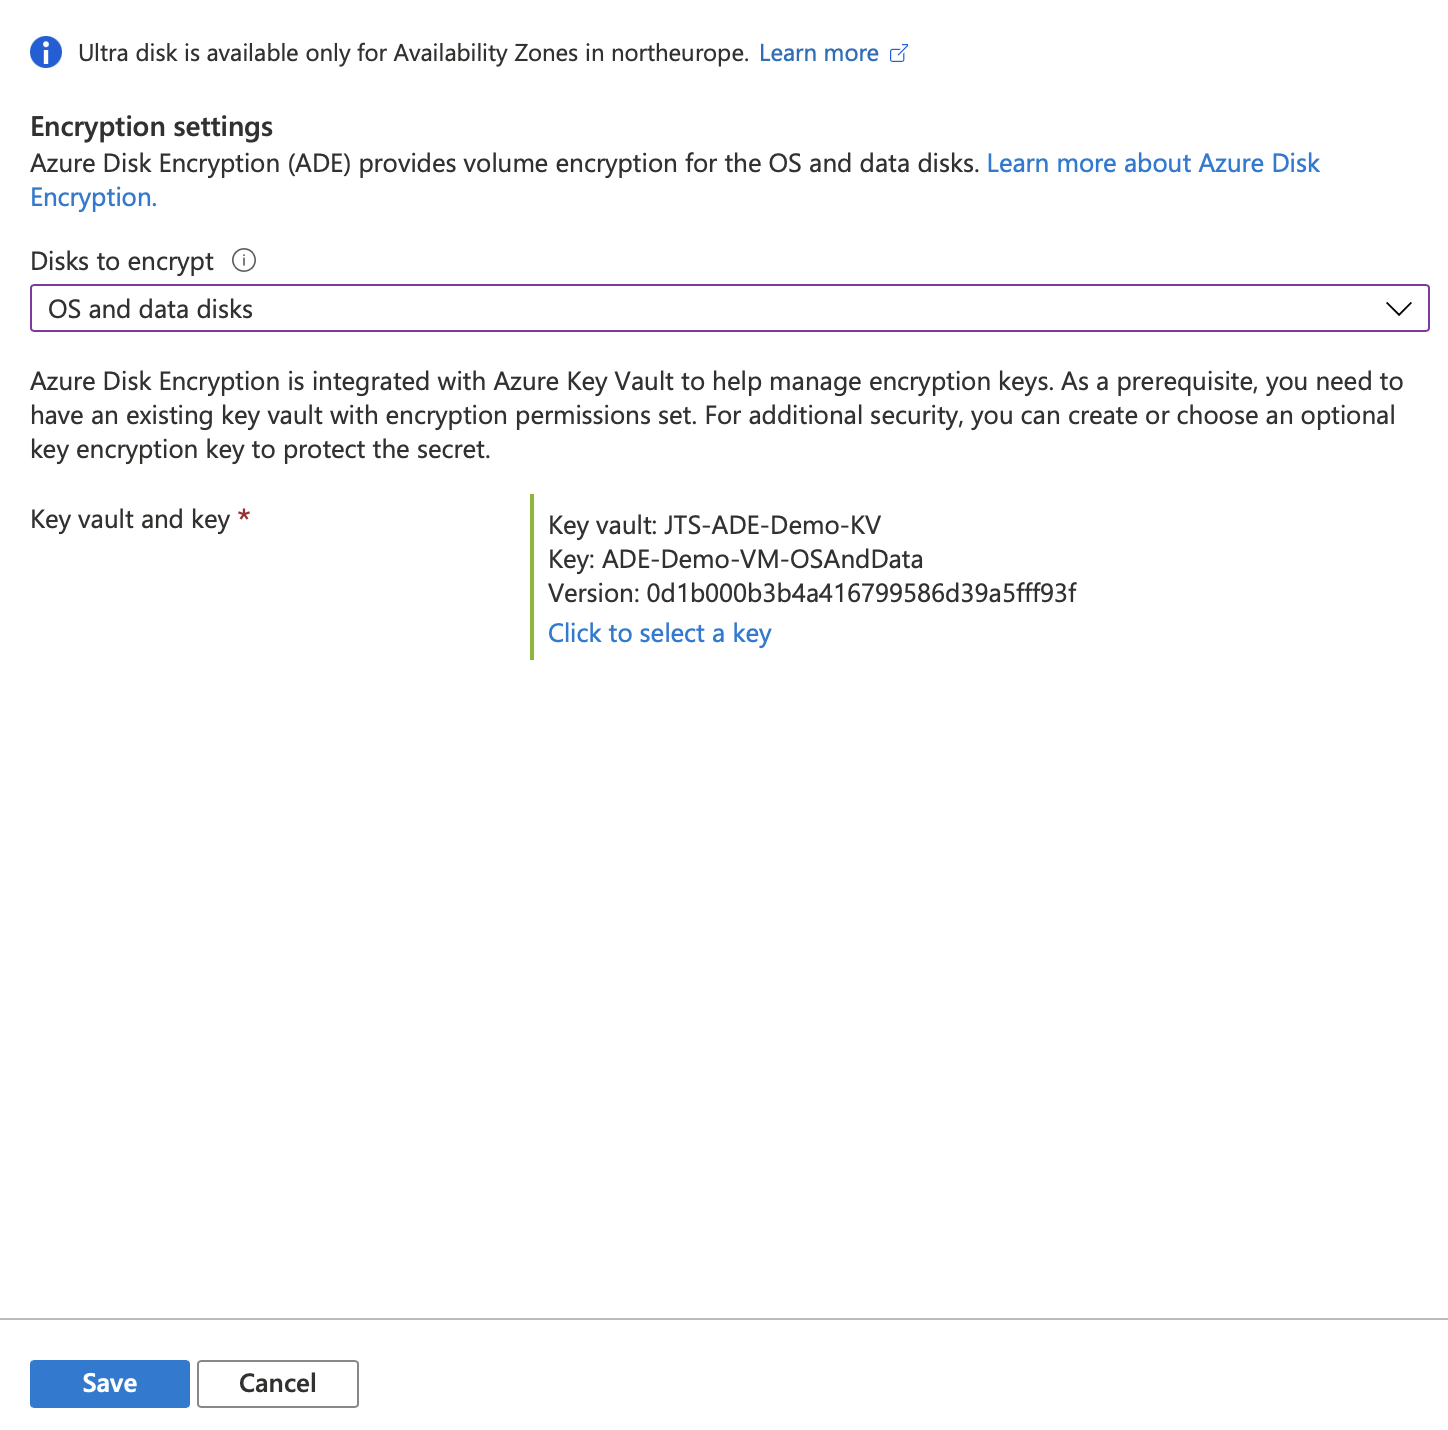
Under “Disks to encrypt” make a choice between OS only or OS and data disks.
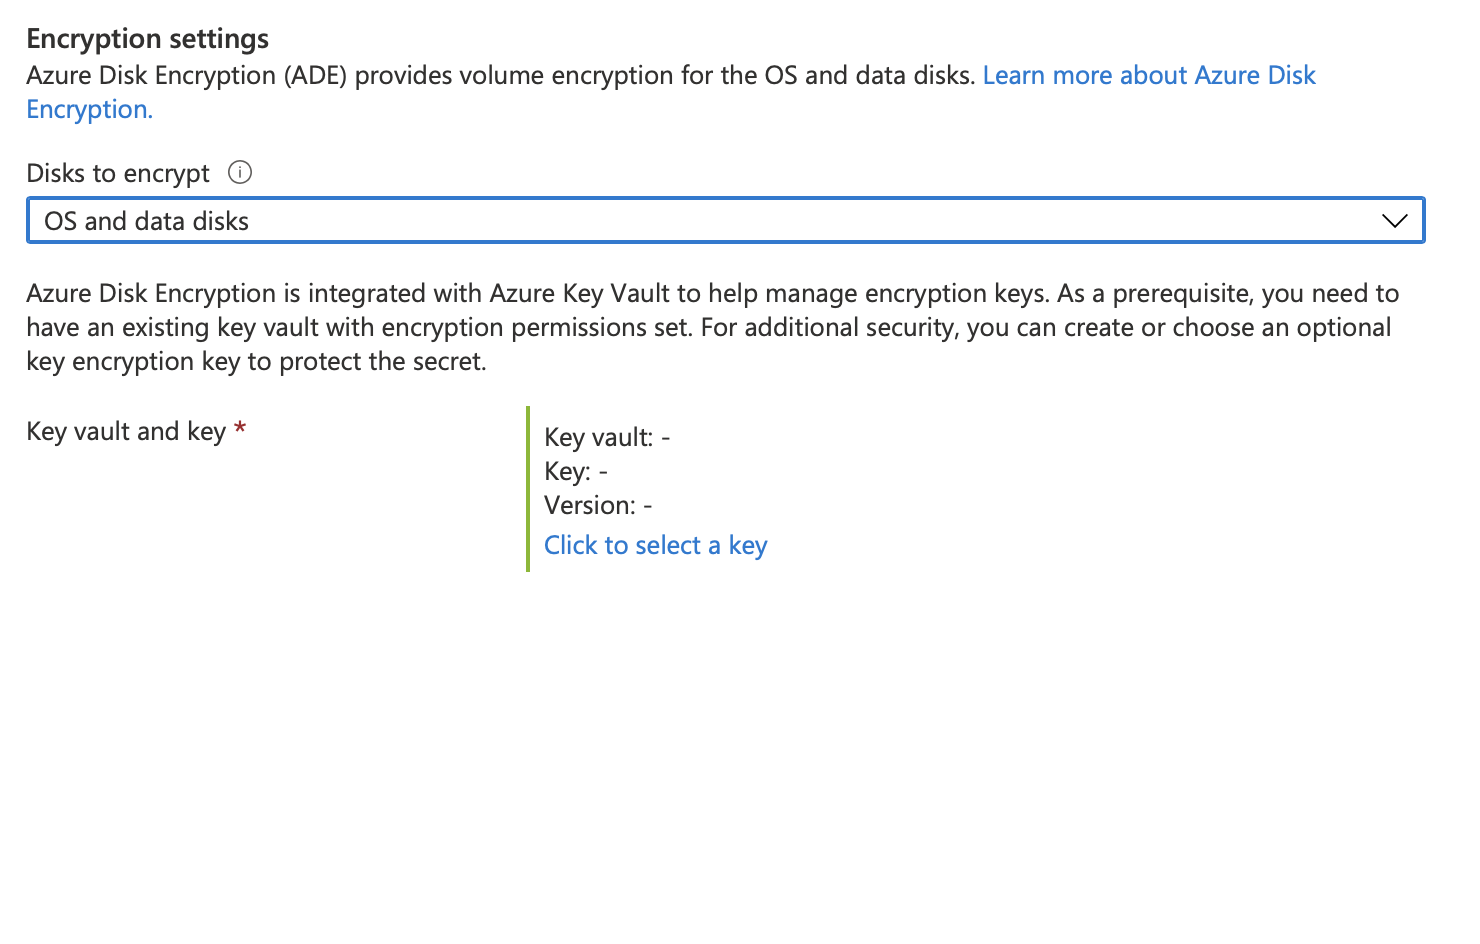
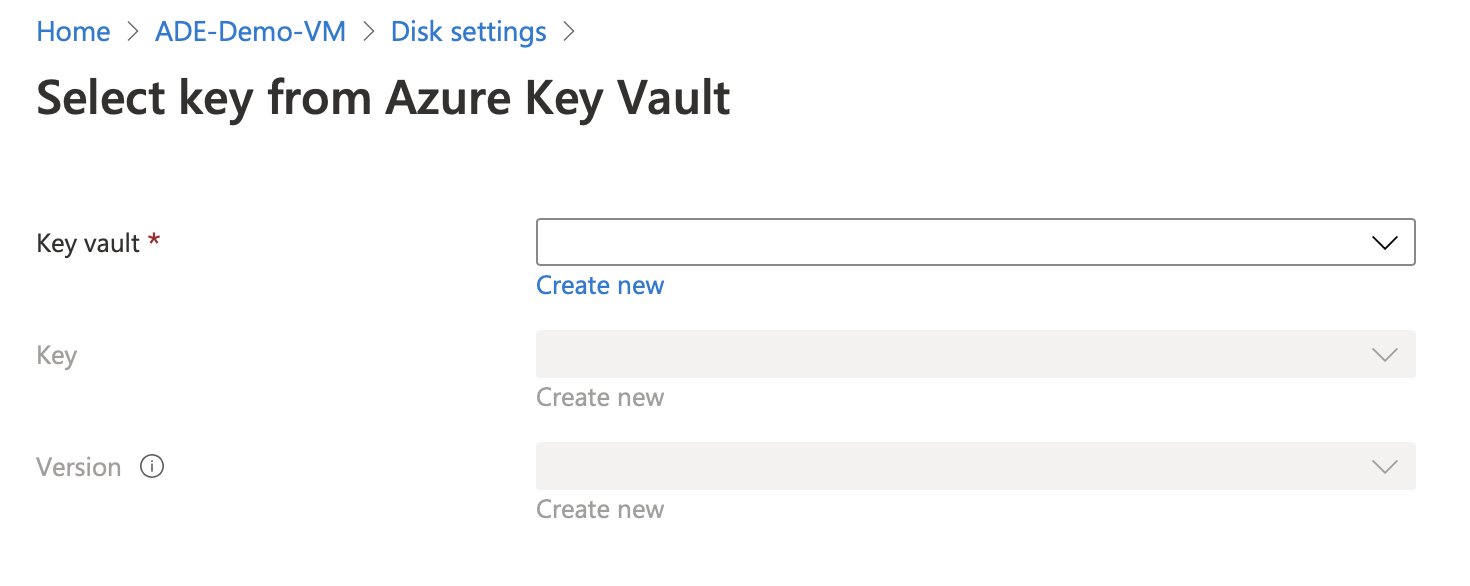
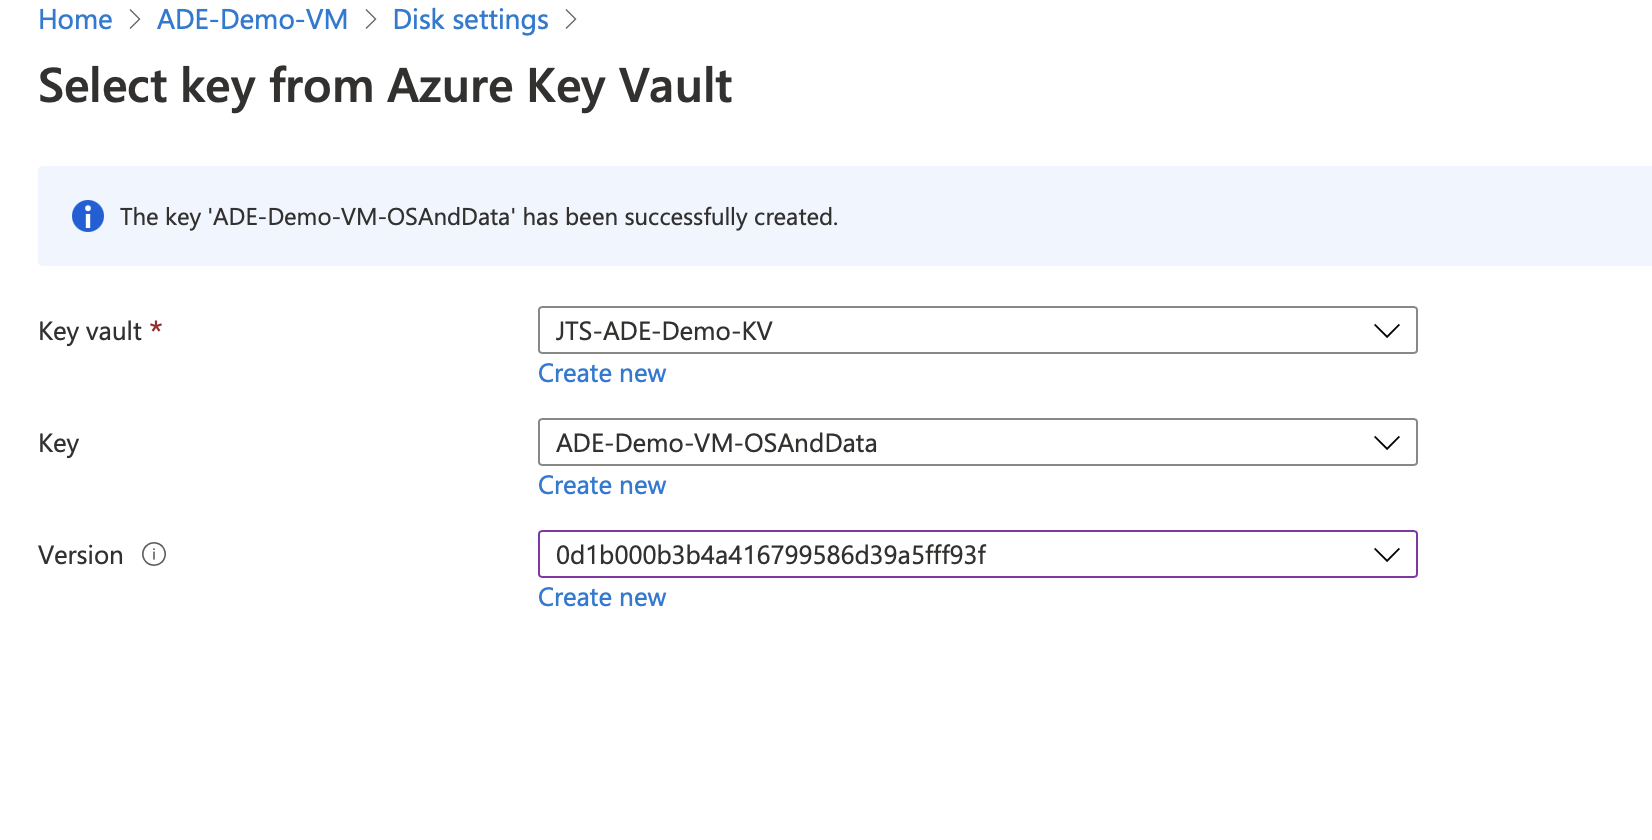
You will then be prompted to select a key vault and can create one if one does not exist.
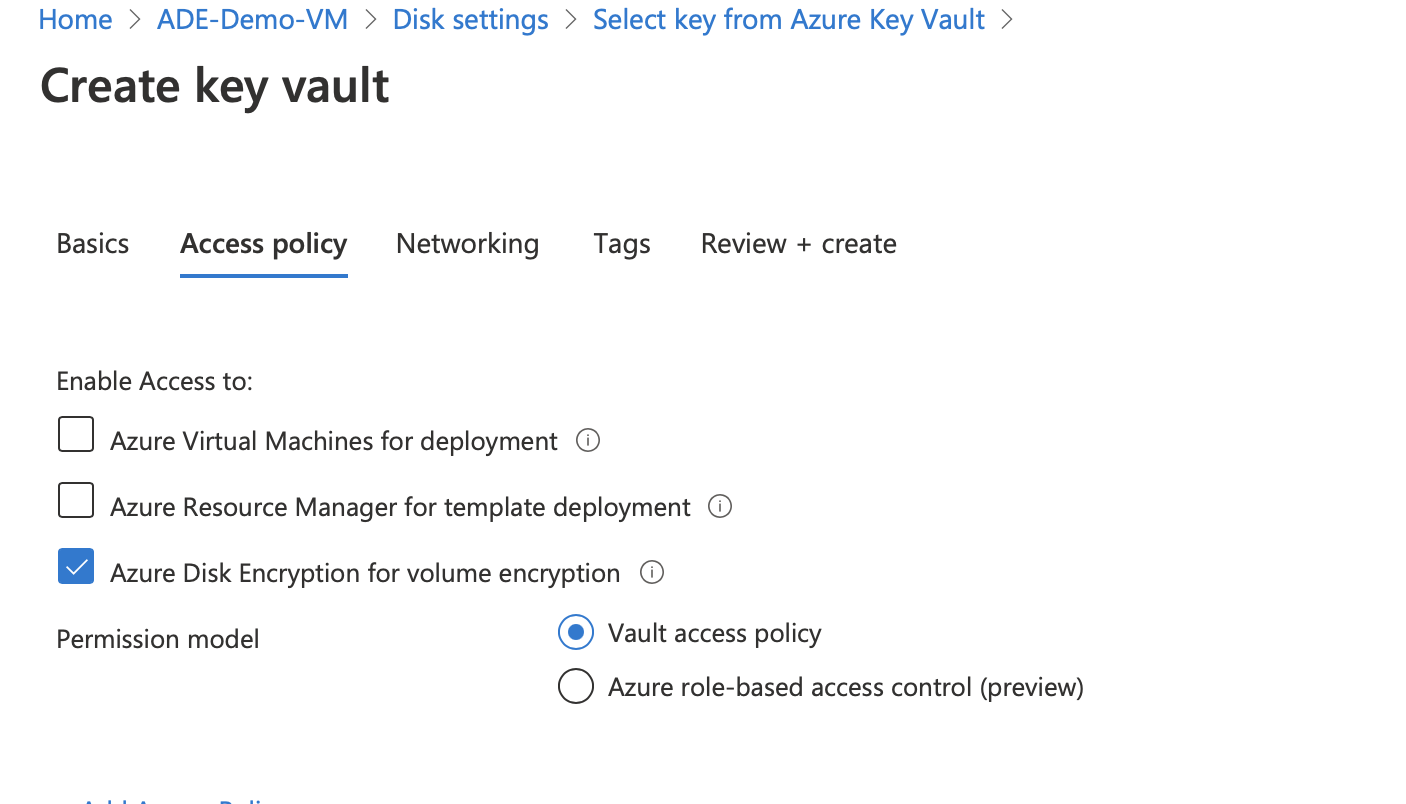
Regardless of if you are creating a new key vault or using an existing, you will need to grant permission for Azure Disk Encryption to retrieve encryption keys from the key vault.
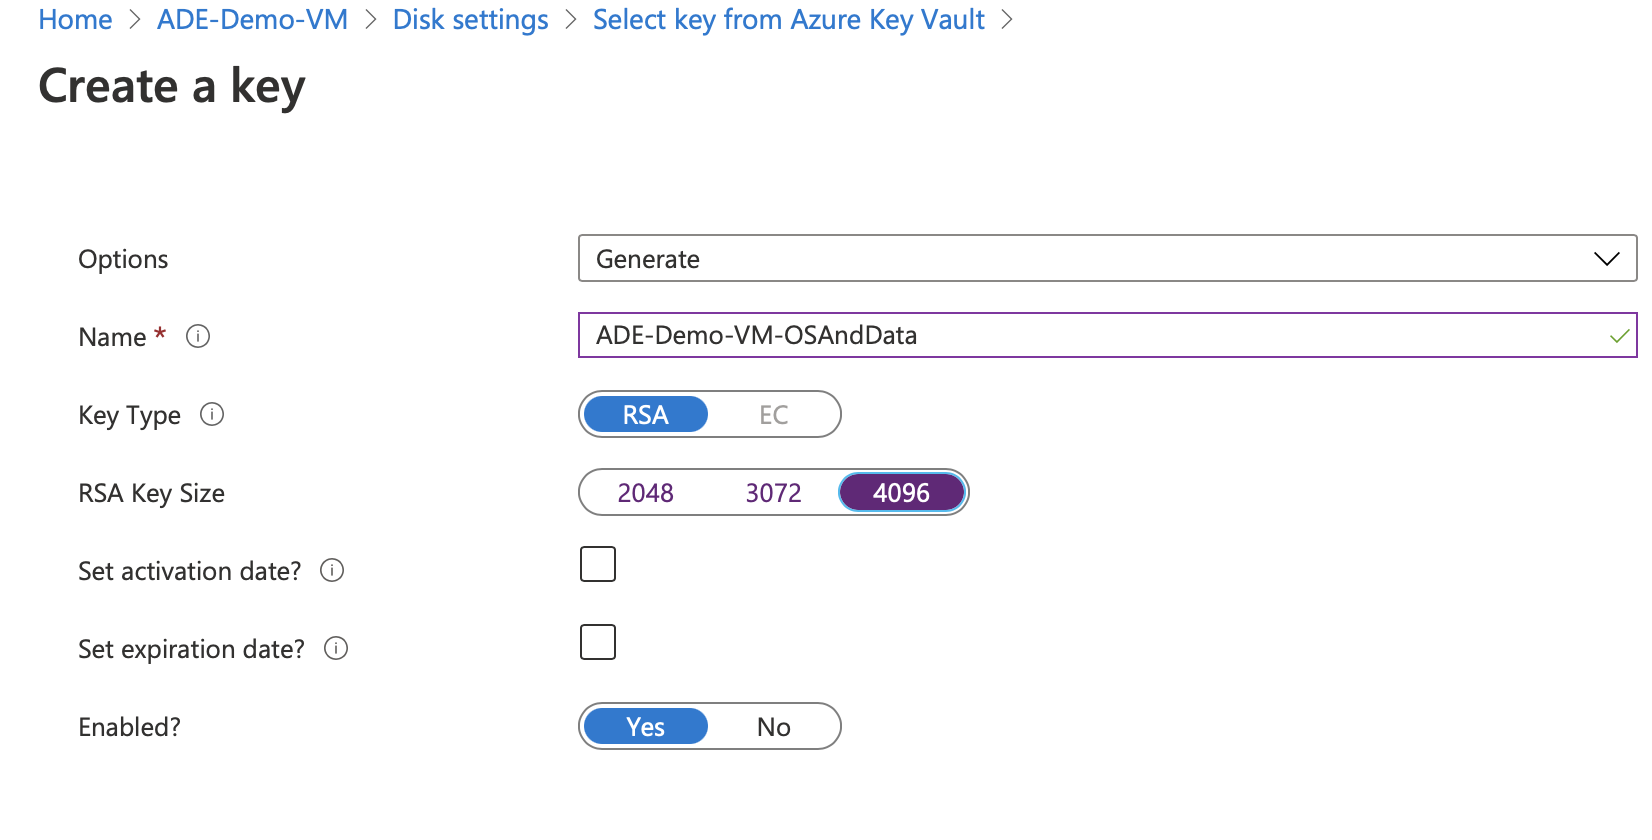
Once the vault is created, you’ll then need to create a key and select the version.
Once done, confirm changes and ADE will be enabled on the VM.
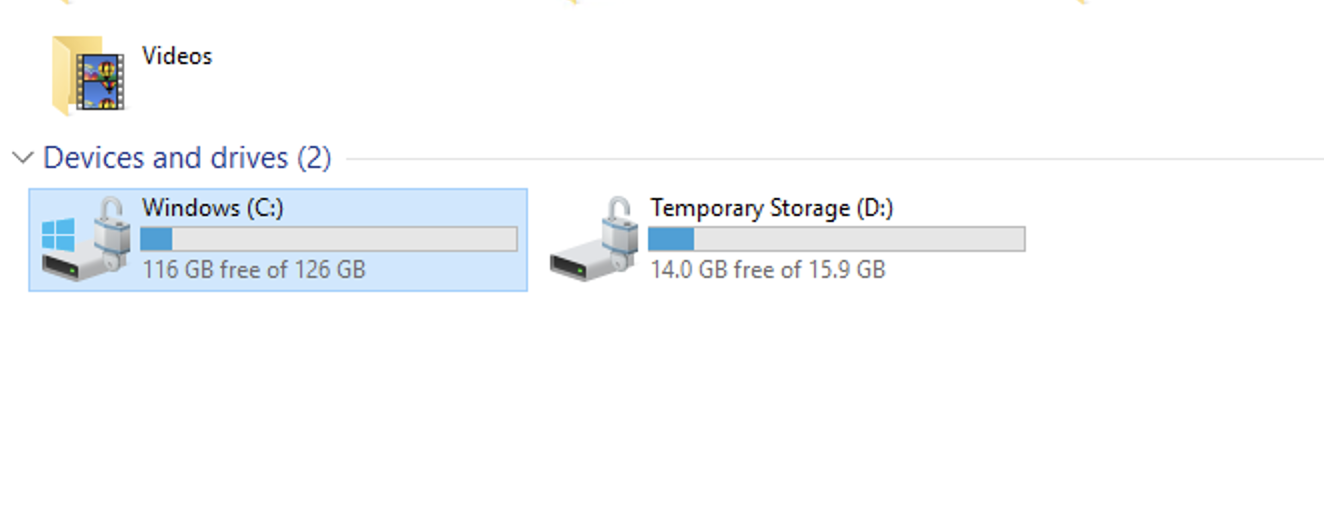
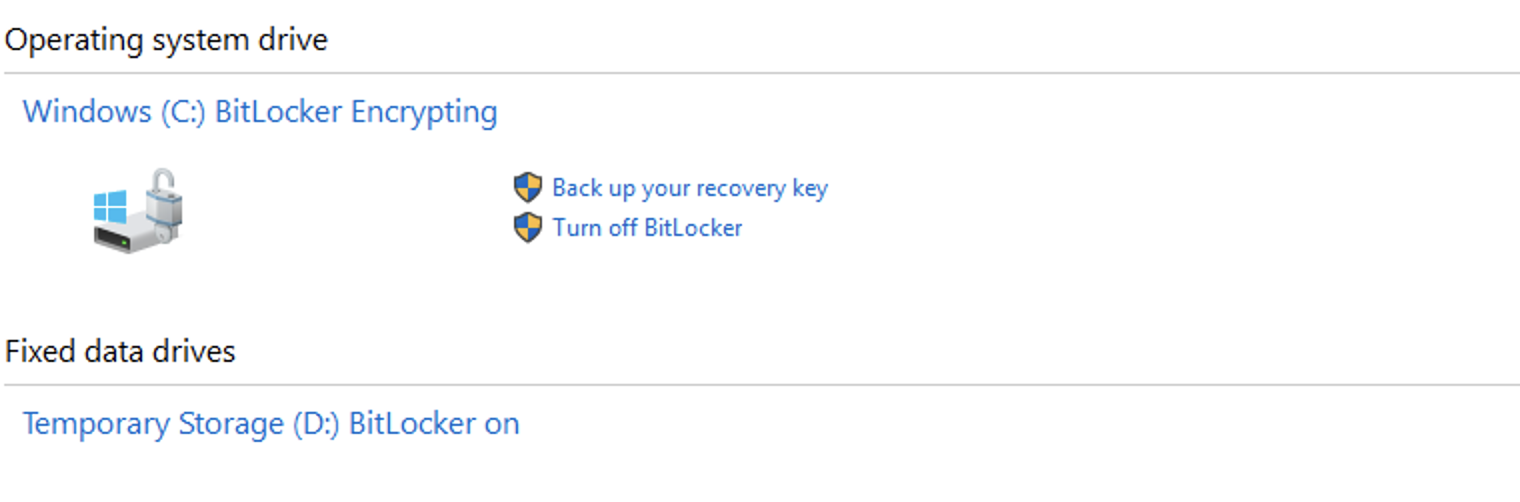
You can confirm that ADE has enabled in-guest encryption. In the below example screenshots, I’m using a Windows VM to confirm that BitLocker is present in the VM OS.

Additional Reading
For further info, the Microsoft documentation is top notch on the subject.
Hopefully this blog post has helped! Feel free to leave any comments below.